Flask Blueprint
上节课完成了我们的基本测试,这节课我们来用Blueprint(蓝图)来对项目进行重构。
还不了解
Blueprint?可以先查看flask blueprint 文档。简单来说,Flask Blueprint提供了模块化管理程序路由的功能,使程序结构清晰、简单易懂。还是不太明白?没关系,这节课完成后我相信你一定会明白的~
在project目录下面新增api的目录,然后同样的需要在该目录下面新建几个文件:
(tdd3)$ touch __init__.py models.py views.py
然后更新views.py文件:
# project/api/views.py
from flask import Blueprint, jsonify

users_blueprint = Blueprint('users', __name__)

@users_blueprint.route('/ping', methods=['GET'])
def ping_pong():
    return jsonify({
        'status': 'success',
        'message': 'pong!'
    })
我们创建了一个users_blueprint的Blueprint实例,然后将该实例绑定到了ping_pong()方法上,这有什么用?继续往下看......
然后更新models.py文件:
# project/api/models.py
import datetime
from project import db

class User(db.Model):
    __tablename__ = "users"
    id = db.Column(db.Integer, primary_key=True, autoincrement=True)
    username = db.Column(db.String(128), nullable=False)
    email = db.Column(db.String(128), nullable=False)
    active = db.Column(db.Boolean(), default=False, nullable=False)
    created_at = db.Column(db.DateTime, nullable=False)

    def __init__(self, username, email):
        self.username = username
        self.email = email
        self.created_at = datetime.datetime.utcnow()
我们可以看到上面的内容和project/__init__.py文件中的User类是一模一样的,没错,我们只是将这个地方代码分拆了而已,下面继续更新project/__init__.py文件:
# project/__init__.py
import os
from flask import Flask, jsonify
from flask_sqlalchemy import SQLAlchemy

# 初始化数据库
db = SQLAlchemy()

def create_app():
    # 初始化应用
    app = Flask(__name__)
    # 环境配置
    app_settings = os.getenv('APP_SETTINGS')
    app.config.from_object(app_settings)
    # 安装扩展
    db.init_app(app)
    # 注册blueprint
    from project.api.views import users_blueprint
    app.register_blueprint(users_blueprint)
    return app
注意这里我们将实例化app的工作提取到了create_app的方法里面去,这是因为users_blueprint里面需要引用到当前文件下面的db实例,如果不把app放置到方法中去的话就会造成循环引用,什么意思?简单来说就是你中有我,我中有你,这对于程序来说是无法做出判断的~
接下来我们需要把所有其他文件引用project下面的app 的实例的都要替换掉(包括测试文件):
from project import create_app

app = create_app()
更改完成以后我们重新构建镜像、创建数据库,最重要的是什么?测试:
(tdd3)$ docker-compose up -d
users-db is up-to-date
Starting users-service ...
Starting users-service ... done
(tdd3)$ docker-compose run users-service python manage.py recreate_db
Starting users-db ... done
(tdd3)$ docker-compose run users-service python manage.py test
Starting users-db ... done
test_app_is_development (test_config.TestDevelopmentConfig) ... ok
test_app_is_production (test_config.TestProductionConfig) ... ok
test_app_is_testing (test_config.TestTestingConfig) ... ok
test_users (test_users.TestUserService)
确保ping的服务正常. ... ok

----------------------------------------------------------------------
Ran 4 tests in 0.086s

OK
一切正常~~~
接下来我们根据RESTful的最佳实践利用TDD增加3个路由:
| Endpoint | HTTP Method | CRUD Method | Result |
|---|---|---|---|
| /users | GET | 查询 | 获取所有用户 |
| /users/:id | GET | 查询 | 获取单个用户 |
| /users | POST | 新增 | 新增用户 |
首先,在project/tests/test_users.py文件的TestUserService类中新增一个测试新增用户的方法:
def test_add_user(self):
    """确保能够正确添加一个用户的用户到数据库中"""
    with self.client:
        response = self.client.post(
            '/users',
            data=json.dumps(dict(username='cnych', email='qikqiak@gmail.com')),
            content_type='application/json',
        )
        data = json.loads(response.data.decode())
        self.assertEqual(response.status_code, 201)
        self.assertIn('qikqiak@gmail.com was added', data['message'])
        self.assertEqual('success', data['status'])
我们现在来执行测试肯定是不会通过的,因为路由/users还没实现的,所以接着我们在project/api/views.py中新增一个/users的处理方法:
# 注意要导入request
from flask import Blueprint, jsonify, request, render_template
from project import db
from project.api.models import User

@users_blueprint.route('/users', methods=['POST'])
def add_user():
    # 获取POST的数据
    post_data = request.get_json()
    email = post_data.get('email')
    user = User(username=post_data.get('username'), email=email)
    db.session.add(user)
    db.session.commit()
    response_data = {
        'status': 'success',
        'message': '%s was added!' % email
    }
    return jsonify(response_data), 201
注意上面我们
add_user方法最终返回的数据,是从我们上面设计的测试代码中来的,这就是所谓的测试驱动我们的开发~
然后执行测试:
(tdd3)$ docker-compose run users-service python manage.py test
Starting users-db ... done
test_app_is_development (test_config.TestDevelopmentConfig) ... ok
test_app_is_production (test_config.TestProductionConfig) ... ok
test_app_is_testing (test_config.TestTestingConfig) ... ok
test_add_user (test_users.TestUserService)
确保能够正确添加一个用户的用户到数据库中 ... ok
test_users (test_users.TestUserService)
确保ping的服务正常. ... ok

----------------------------------------------------------------------
Ran 5 tests in 0.157s

OK
测试通过~~~
但是还没完呢?现在我们的代码还不够健壮,如果程序中出现了错误或者异常该怎么办呢?比如:
- POST 的数据为空
- POST 的数据无效 - 比如JSON 对象是空的或者包含一个错误的key
- 如果添加的用户在数据中已经存在?
来对这些用例添加一些测试代码:
def test_add_user_invalid_json(self):
    """如果JSON对象为空,确保抛出一个错误。"""
    with self.client:
        response = self.client.post(
            '/users',
            data=json.dumps(dict()),
            content_type='application/json'
        )
        data = json.loads(response.data.decode())
        self.assertEqual(response.status_code, 400)
        self.assertIn('Invalid payload', data['message'])
        self.assertEqual('fail', data['status'])

def test_add_user_invalid_json_keys(self):
    """如果JSON对象中没有username或email,确保抛出一个错误。"""
    with self.client:
        response = self.client.post(
            '/users',
            data=json.dumps(dict(email='qikqiak@gmail.com')),
            content_type='application/json'
        )
        data = json.loads(response.data.decode())
        self.assertEqual(response.status_code, 400)
        self.assertIn('Invalid payload', data['message'])
        self.assertEqual('fail', data['status'])

    with self.client:
        response = self.client.post(
            '/users',
            data=json.dumps(dict(username='cnych')),
            content_type='application/json'
        )
        data = json.loads(response.data.decode())
        self.assertEqual(response.status_code, 400)
        self.assertIn('Invalid payload', data['message'])
        self.assertEqual('fail', data['status'])

def test_add_user_duplicate_user(self):
    """如果邮件已经存在确保抛出一个错误。"""
    with self.client:
        self.client.post(
            '/users',
            data=json.dumps(dict(
                username='cnych',
                email='qikqiak@gmail.com'
            )),
            content_type='application/json'
        )
        response = self.client.post(
            '/users',
            data=json.dumps(dict(
                username='cnych',
                email='qikqiak@gmail.com'
            )),
            content_type='application/json'
        )
        data = json.loads(response.data.decode())
        self.assertEqual(response.status_code, 400)
        self.assertIn('Sorry. That email already exists.', data['message'])
        self.assertEqual('fail', data['status'])
现在我们支持测试命令,肯定是不会通过的,因为还没更新handler 呢:
from flask import Blueprint, jsonify, request, render_template
from sqlalchemy import exc
from project import db
from project.api.models import User

@users_blueprint.route('/users', methods=['POST'])
def add_user():
    # 获取POST的数据
    post_data = request.get_json()
    if not post_data:
        response_data = {
            'status': 'fail',
            'message': 'Invalid payload.'
        }
        return jsonify(response_data), 400
    email = post_data.get('email')
    username = post_data.get('username')
    try:
        user = User.query.filter_by(email=email).first()
        if not user:
            # 证明数据库中不存在该email的用户,可以添加
            db.session.add(User(username=username, email=email))
            db.session.commit()
            response_data = {
                'status': 'success',
                'message': '%s was added!' % email
            }
            return jsonify(response_data), 201
        # 证明该email已经存在
        response_data = {
            'status': 'fail',
            'message': 'Sorry. That email already exists.'
        }
        return jsonify(response_data), 400
    except exc.IntegrityError as e:
        db.session.rollback()  # 出现异常了,回滚
        response_data = {
            'status': 'fail',
            'message': 'Invalid payload.'
        }
        return jsonify(response_data), 400
然后执行我们的测试命令,现在就能够测试通过了,如果出现了问题那么你应该仔细看看你的代码了~
接下来处理另外两个请求。
获取单个用户信息,还是先进行测试:
from project.api.models import User
from project import db

def test_get_user(self):
    user = User(username='cnych', email='qikqiak@gmail.com')
    db.session.add(user)
    db.session.commit()
    with self.client:
        response = self.client.get('/users/%d' % user.id)
        data = json.loads(response.data.decode())
        self.assertEqual(response.status_code, 200)
        self.assertTrue('created_at' in data['data'])
        self.assertEqual('cnych', data['data']['username'])
        self.assertEqual('qikqiak@gmail.com', data['data']['email'])
        self.assertEqual('success', data['status'])
然后来编写获取单个用户请求的处理函数,更新project/api/views.py文件:
@users_blueprint.route('/users/<user_id>', methods=['GET'])
def get_user(user_id):
    """获取某用户的详细信息"""
    user = User.query.filter_by(id=user_id).first()
    response_object = {
        'status': 'success',
        'data': {
            'username': user.username,
            'email': user.email,
            'created_at': user.created_at
        }
    }
    return jsonify(response_object), 200
现在执行测试命令,测试能够通过了,那应该有哪一些错误处理的场景呢:
- 没有提供id
- id不存在
然后我们来针对上面两种场景添加测试代码:
def test_get_user_no_id(self):
    """如果没有id的时候抛出异常。"""
    with self.client:
        response = self.client.get('/users/xxx')
        data = json.loads(response.data.decode())
        self.assertEqual(response.status_code, 400)
        self.assertIn('Param id error', data['message'])
        self.assertEqual('fail', data['status'])

def test_get_user_incorrect_id(self):
    """如果ID不存在则要抛出异常"""
    with self.client:
        response = self.client.get('/users/-1')
        data = json.loads(response.data.decode())
        self.assertEqual(response.status_code, 404)
        self.assertIn('User does not exist', data['message'])
        self.assertEqual('fail', data['status'])
然后根据上面我们的测试代码来更新get_user函数:
@users_blueprint.route('/users/<user_id>', methods=['GET'])
def get_user(user_id):
    """获取某用户的详细信息"""
    response_object = {
        'status': 'fail',
        'message': 'User does not exist'
    }
    code = 404
    try:
        user = User.query.filter_by(id=int(user_id)).first()
        if user:
            response_object = {
                'status': 'success',
                'data': {
                    'username': user.username,
                    'email': user.email,
                    'created_at': user.created_at
                }
            }
            code = 200
    except ValueError:
        response_object = {
            'status': 'fail',
            'message': 'Param id error'
        }
        code = 400
    finally:
        return jsonify(response_object), code
然后继续执行我们的测试命令,通过~~~
然后是获取所有的用户列表的请求,这节就让我们的读者朋友自己来动手实践吧,最终代码我们会同步到github上去的,记住要用TDD的思想,先写测试代码,然后编写我们的网络请求函数,然后编写一些异常场景下面的测试代码,继续增强我们的请求函数,再测试。
上面的步骤完成后,我们试着在浏览器中打开http://127.0.0.1:5001/users接口,不出意外的话我们会看到如下的json信息输出:
{
    "data": {
        "users": []
    },
    "status": "success"
}
这是因为我们的数据库中还没有任何的数据,所以肯定这里得到的是一个空的数据列表。为了测试方便,我们在manage.py文件中增加一个命令来添加一些测试数据吧:
from project.api.models import User
@manager.command
def seed_db():
    """Seeds the database."""
    db.session.add(User(username='cnych', email="qikqiak@gmail.com"))
    db.session.add(User(username='chyang', email="icnych@gmail.com"))
    db.session.commit()
然后我们在命令行中执行seed_db命令:
(tdd3)$ docker-compose run users-service python manage.py seed_db
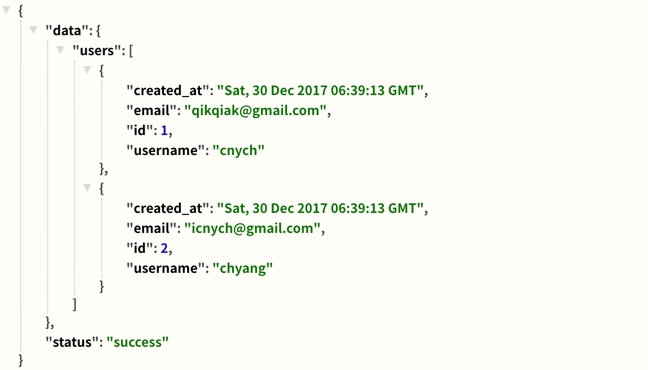
执行成功后,我们再次在浏览器中打开上面的接口,已经能够看到用户列表信息了。